Step 1: Navigate to the Double Call Section
Log in to your Convin dashboard.
From the left sidebar, click on the AI Agent (Voicebot) icon to open the Voice Call section.
In the All Batches tab, click on the “Create Bulk Call” button at the top-right.
Then choose “With Flow” from the dropdown.
Step 2: Configure Your Double Call (With Flow)
After selecting “With Flow”, a new configuration screen will appear.
You’ll be prompted to:
Select Call Flow:
Choose a pre-configured Double Call Flow from the dropdown.
This defines how both calls will be initiated and in what sequence (e.g., fallback, confirmation, dual messaging).Upload CSV File:
Click + CSV to upload your contact list.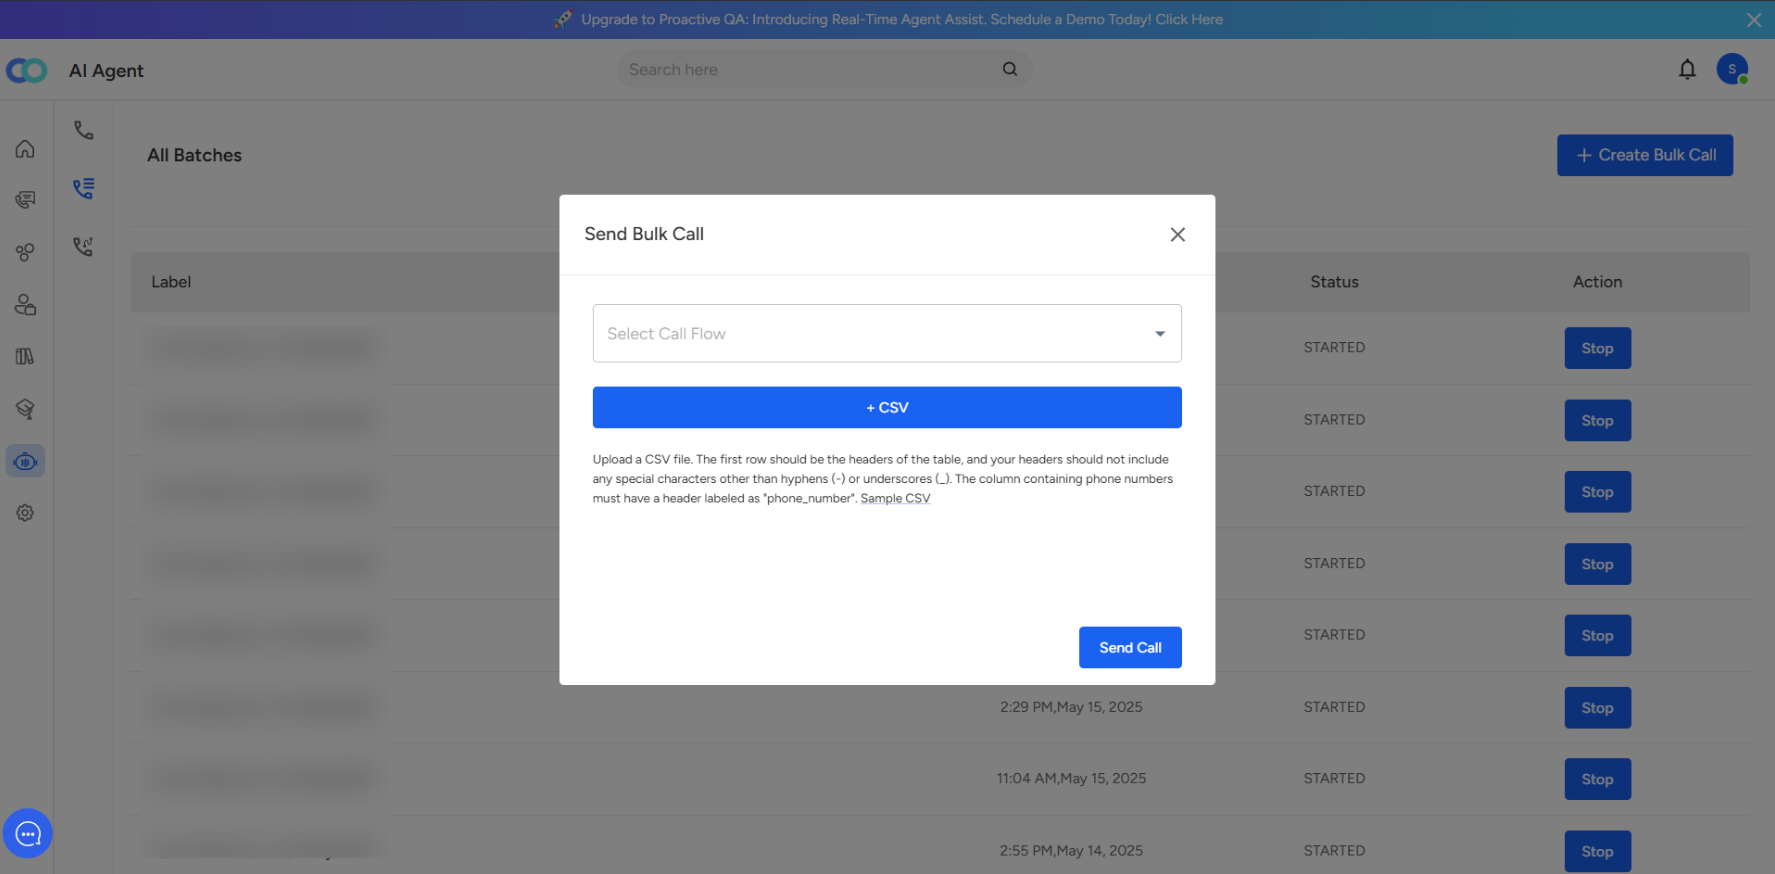 ⚠️ Make sure your file follows the correct format:
The first row must contain headers.
The phone number column should be named "phone_number".
Avoid using special characters in headers (only hyphens or underscores are allowed).
Step 3: Sending the Double Call
Once both the Call Flow and CSV are selected:
Click the Send Call button.
The AI system will start triggering the double call sequence as per the logic defined in the selected flow.
- You can track the progress or stop ongoing calls directly from the All Batches section
- Pro Tip:
Use double calls when you want to:
Run a two-part interaction (e.g., intro + feedback call)
Reconnect with users who didn’t answer the first time
Trigger confirmation follow-ups automatically
Step 4:
This screen is used to set up and initiate bulk outbound calls through an AI agent. It allows you to upload contact lists, configure call settings, and define conversational goals.

Field-by-Field Breakdown
Label
A custom name for this bulk call campaign.
Helps in identifying or organizing multiple campaigns.
Example: "Product Demo Follow-Up – March Batch"
Agent Name
The name you assign to your AI agent for this campaign.
This will help differentiate between multiple agents if you run more than one at the same time.
Example: "Support Agent Tara"
Agent Description
A short description about your AI agent.
Default placeholder: "You are a female agent from <company_name>"
You can customize it to reflect the persona or tone of the agent.
Example: "You are a friendly support representative from Acme Corp, helping customers with order issues."
CSV Upload (+ CSV Button)
This is where you upload your contact list.
Requirements for the CSV file:
The first row must contain column headers.
Avoid special characters (other than hyphens
-or underscores_) in headers.The column containing phone numbers must have the header labeled
phone_number.
Once uploaded, the agent will call all numbers in the file.
Pathway ID (Optional)
If provided, this links the call to a specific predefined conversational flow.
When set, it overrides the Prompt field (Prompt becomes null).
If left empty, the AI will follow the prompt you define below.
Prompt (Conversational Goal)
A free-text field where you describe what the AI should achieve in the call.
Example: "Introduce our new insurance plan, confirm eligibility, and schedule a callback if interested."
Temperature (Slider)
Adjusts how strictly or creatively the AI follows the script:
Lower temperature (left) – More strict, predictable responses.
Higher temperature (right) – More flexible, conversational responses.
Voice Selection (Tara F)
Lets you pick the voice of the AI agent.
In this example, the voice is set to Tara (Female).
Call Starting Language
The default language in which the call will start.
In this case, it’s set to English.
Start Time
Schedule when the bulk call should begin.
You can select the date and time from the calendar widget.
Create Call Button
Once all the details are filled, click Create Call to launch or schedule the campaign.
📩 Still need help? Contact our support team at [email protected] —we’re happy to assist!
Good day!