How to Navigate to Advanced Filters: Step-by-Step Guide
Accessing Advanced Filters
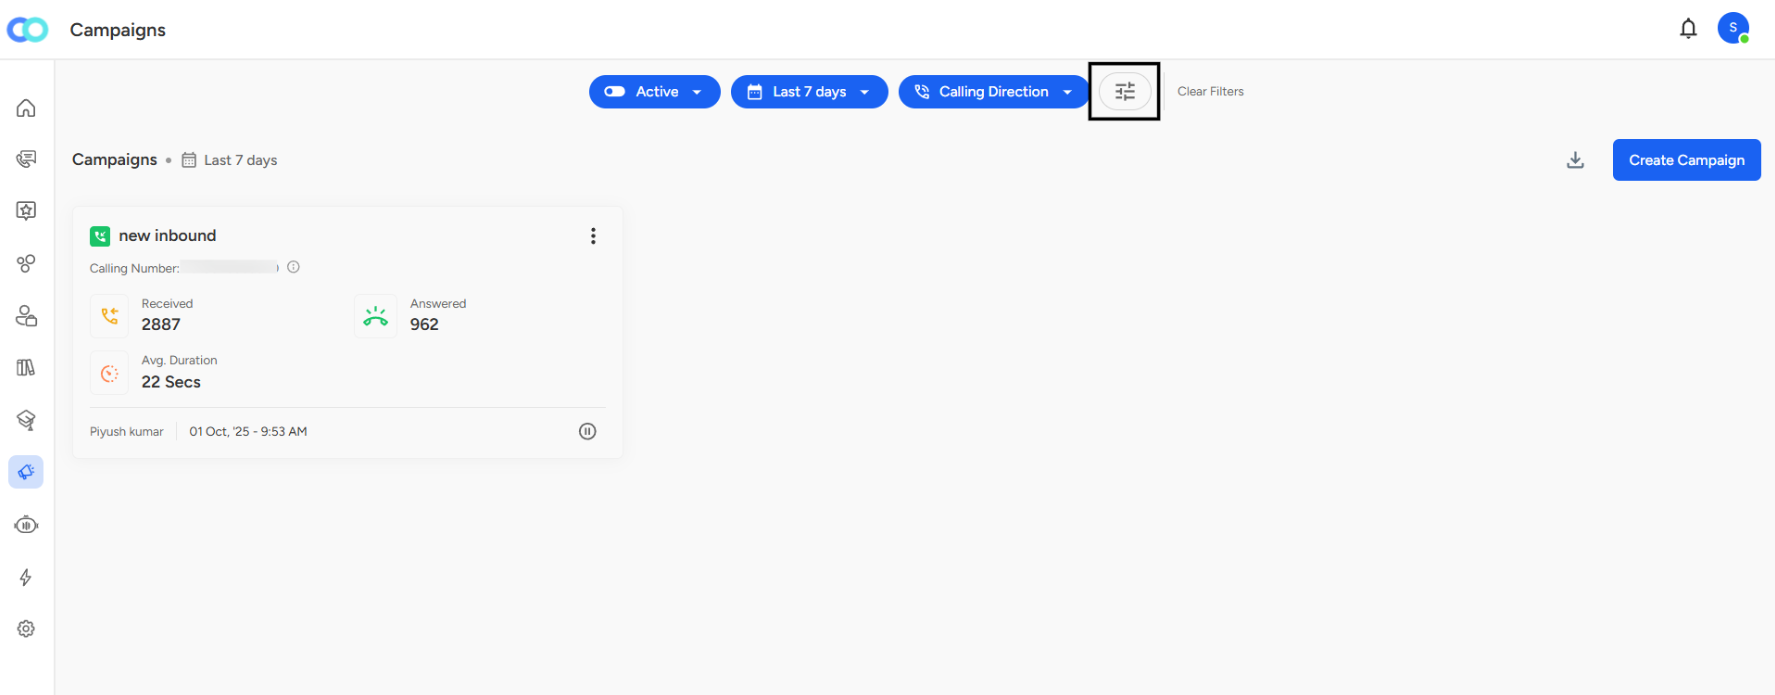
Step 1: Locate the Filter Icon
On the Campaigns page, look at the top filter bar where you see buttons like "Active," "Last 7 days," and "Calling Direction."
Step 2: Click the Advanced Filters Icon
Find the filter icon (looks like horizontal sliders or lines) next to the "Clear Filters" button on the right side of the filter bar.
Step 3: Advanced Filters Panel Opens
A side panel titled "Advanced Filters" slides in from the right side of your screen.
Voice:
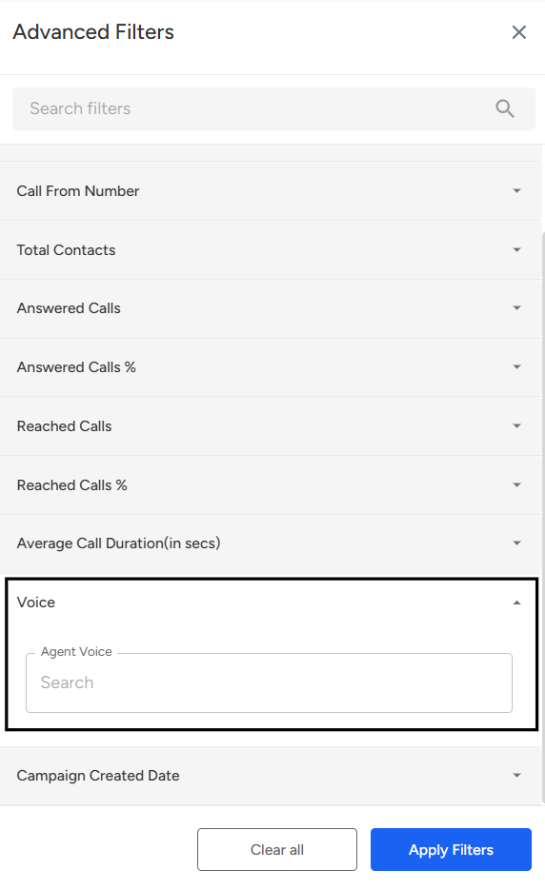
Voice (Agent Voice)
Location:
Listed below the Average Call Duration filter in the panel.Purpose:
Allows filtering campaigns by the specific agent voice associated with them.Input Type:
A searchable dropdown field where users can type or select an Agent Voice name.
Usage:
Select a specific agent voice to view only campaigns handled or configured with that voice profile.
Helps analyze agent-based performance metrics or voice campaign consistency.
Use Cases:
Comparing performance between different agent voices.
Tracking outcomes for specific IVR or automated voice configurations.
📩 Still need help? Contact our support team at [email protected]—we’re happy to assist!
Good Day!