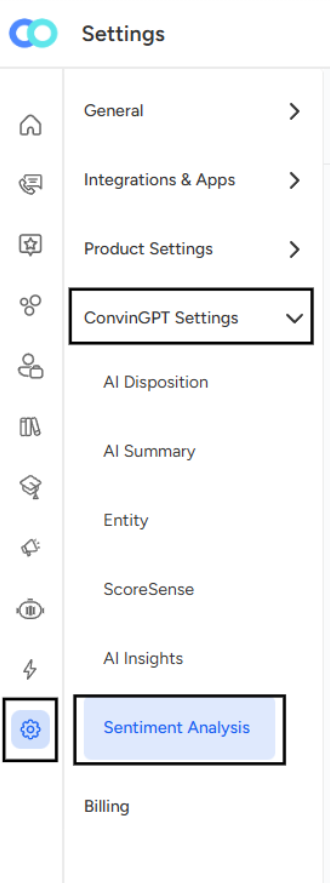
Step 1: Navigate to Sentiment Analysis
Click on Settings in the main navigation menu
In the left sidebar, expand ConvinGPT Settings
Select Sentiment Analysis from the menu options
You'll see the "Positive & Negative Sentiment" section with a Configure button
Step 2: Open Configuration
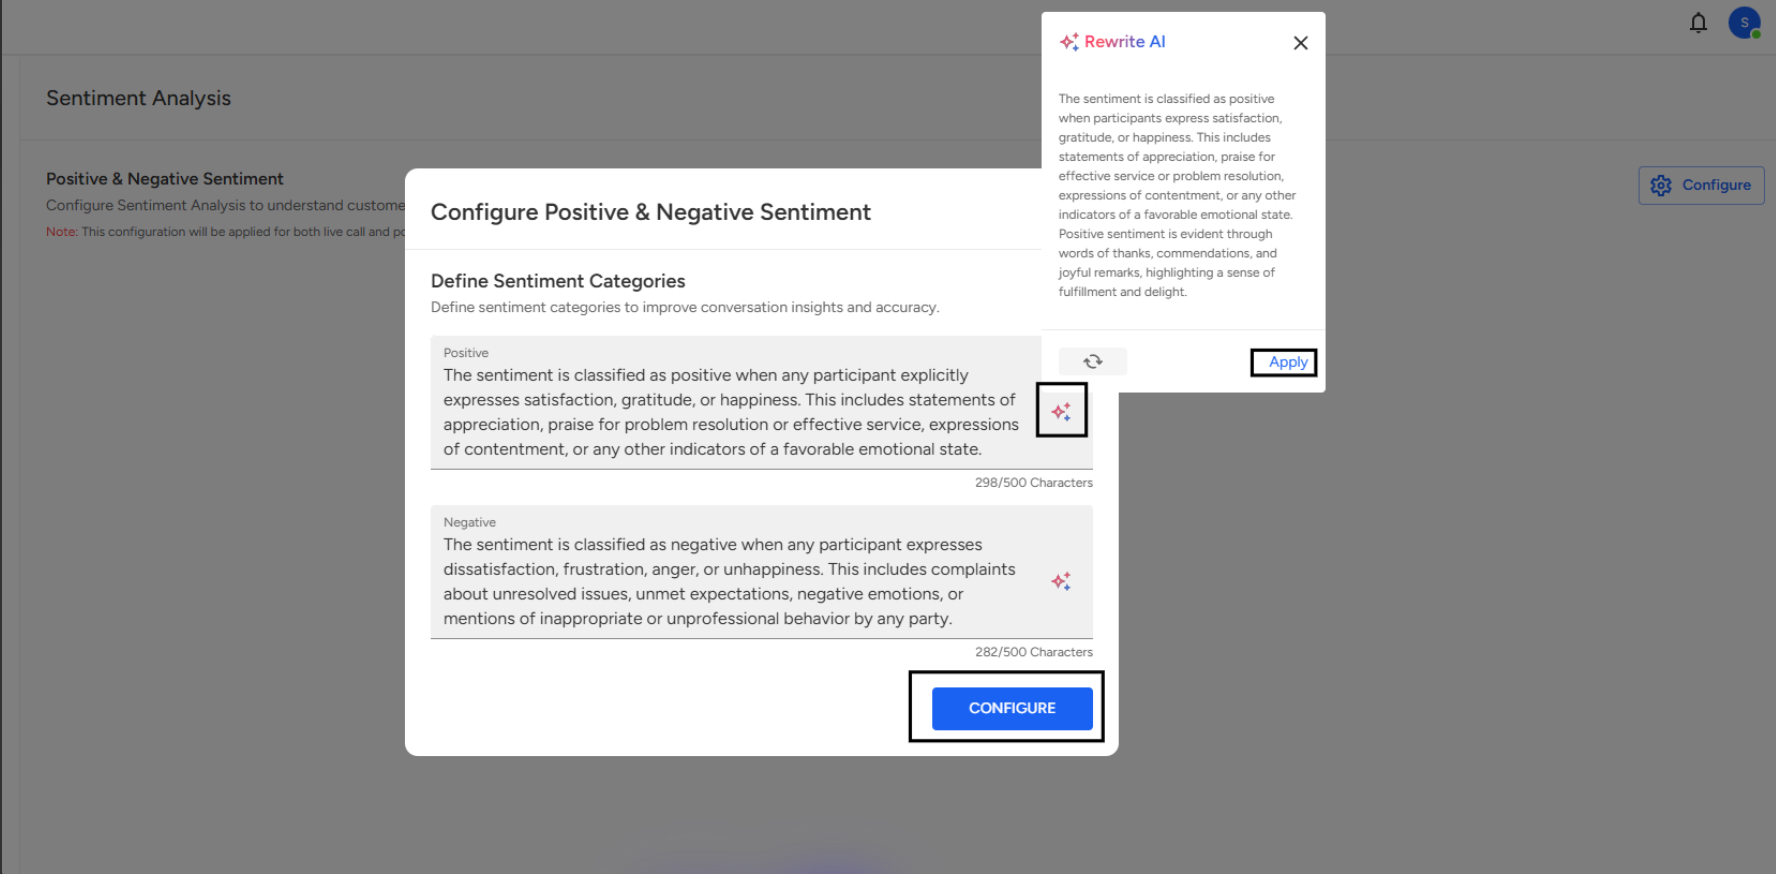
Click the Configure button to open the "Configure Positive & Negative Sentiment" dialog. This is where you'll define how the system classifies emotions in conversations.
Configuring Sentiment Categories
The configuration dialog allows you to customize how positive and negative sentiments are identified. This customization improves conversation insights and accuracy for your specific use case.
Defining Positive Sentiment
In the Positive text field, describe what constitutes positive sentiment for your conversations. Here's the default example:
"The sentiment is classified as positive when any participant explicitly expresses satisfaction, gratitude, or happiness. This includes statements of appreciation, praise for problem resolution or effective service, expressions of contentment, or any other indicators of a favorable emotional state."
Character limit: 500 characters (298/500 shown in the example)
Defining Negative Sentiment
In the Negative text field, describe what constitutes negative sentiment. Here's the default example:
"The sentiment is classified as negative when any participant expresses dissatisfaction, frustration, anger, or unhappiness. This includes complaints about unresolved issues, unmet expectations, negative emotions, or mentions of inappropriate or unprofessional behavior by any party."
Character limit: 500 characters (282/500 shown in the example)
Using the Rewrite AI Feature
Notice the Rewrite AI option in the top-right corner of the configuration modal. This feature helps you refine your sentiment definitions:
- Click the sparkle icon next to each text field to access AI-powered rewriting suggestions
- The AI can help you articulate sentiment criteria more clearly
- Click Apply to use the AI-generated text
Saving Your Configuration
Once you've defined your sentiment categories:
- Review both the positive and negative definitions
- Ensure they accurately reflect how you want emotions classified in your conversations
- Click the CONFIGURE button at the bottom of the modal to save your settings
Important Note: This configuration will be applied for both live call and post-call analysis, ensuring consistent sentiment detection across all conversation types.
📩 Still need help? Contact our support team at [email protected] —we’re happy to assist!
Good day!